
Hi Flutter dev! If you’ve found your way here, you’re probably wondering how to add a monochrome icon to your Flutter app targeting Android. You might have tried a few plugins, but the good news is — this can actually be done natively using Android Studio. In particular, we’ll be using a built-in tool called Image Asset Studio. Let’s dive in!
What is monochrome adaptive icons
To make sure we’re on the same page, let’s first clarify what a monochrome adaptive icons is. There’s a caveat here — the steps to enable this might vary slightly across Android devices. Typically, when you long-press on the home screen, you’ll find a settings option to customize the home layout, including icon styles. If you explore those settings, you’ll likely come across an option to switch icons to a monochrome style. This style usually involves just two or three colors — one for the background and one or two for the foreground.
You may notice that not all apps follow this setting, often because they haven’t been properly configured to support it. And chances are, your Flutter app is one of them. You probably wish your app could match this modern look — and you’re right! Adapting to current best practices is usually a smart move. Got you covered.
The key
If you’re a big fan of VS Code and rarely venture into other IDEs, now’s the perfect time to revisit Android Studio. Yes, you’ll need it — and trust me, it’s incredibly helpful when it comes to configuring adaptive icons.
Let’s take this opportunity to create a simple empty Jetpack Compose app. Why? Because when you create a new project in Android Studio, adaptive icons are configured by default. This gives you a clean, working example to observe and understand how everything fits together — your “aha!” moment is waiting.
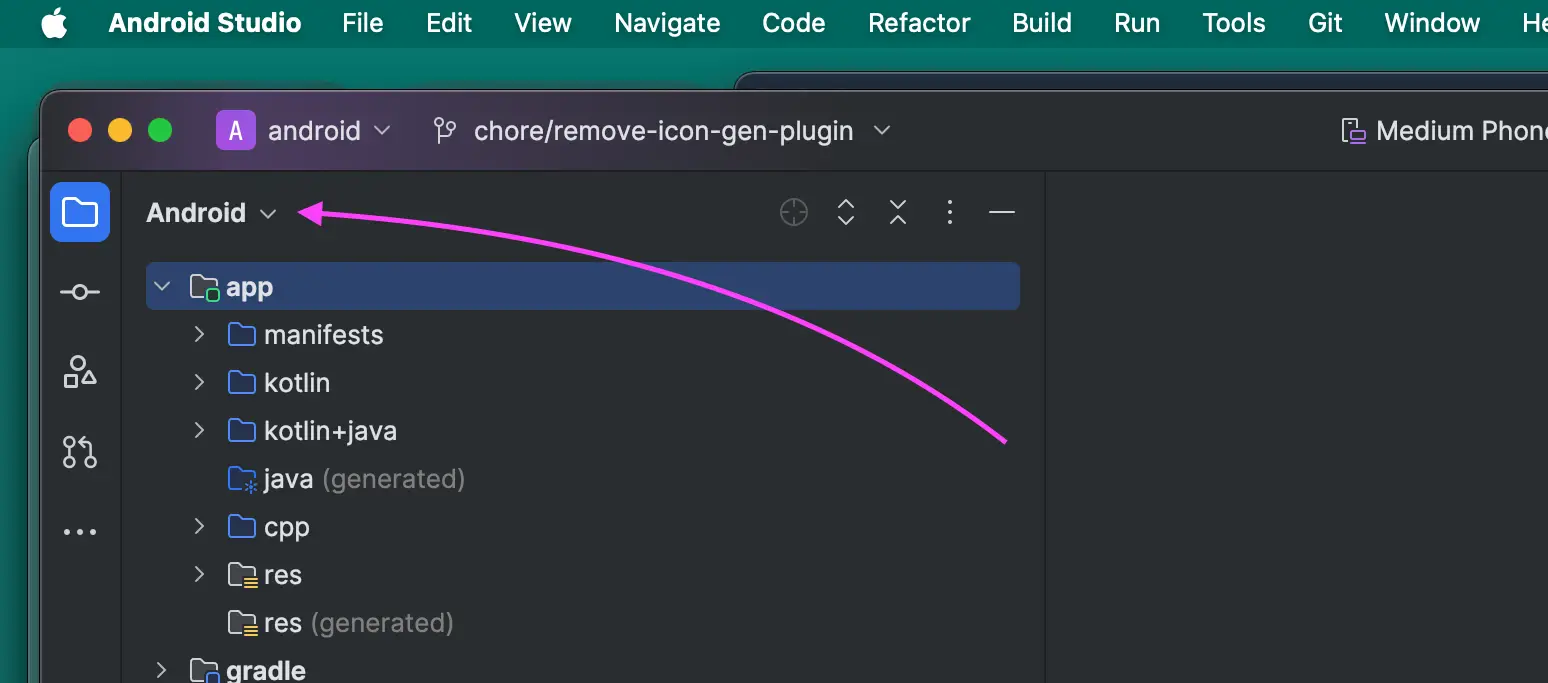
Once your new project is set up, make sure the project directory view is set to “Android”. This is important, because the Android project view differs from the actual file system you’d see in Windows File Explorer or macOS Finder.
Now, navigate to res/mipmap/ic_launcher/ic_launcher.xml file. Inside this file, you’ll see a line that defines the monochrome icon. That single line is the key — it’s all you need to make your app support monochrome icons.
<?xml version="1.0" encoding="utf-8"?>
<adaptive-icon xmlns:android="http://schemas.android.com/apk/res/android">
    <background android:drawable="@drawable/ic_launcher_background" />
    <foreground android:drawable="@drawable/ic_launcher_foreground" />
    <--! Right here -->
    <monochrome android:drawable="@drawable/ic_launcher_foreground" />
</adaptive-icon>
Configure the Flutter project
With that in mind, let’s dive into your Flutter project’s android directory using Android Studio. First things first: you’ll need to create two XML files inside the “drawable” folder — one for the background and one for the foreground. These should be named ic_launcher_background.xml and ic_launcher_foreground.xml.
What goes inside these files? Your icon design! Don’t worry, it’s simpler than it sounds. First, let’s create two SVG files in Figma. The key sizing detail to remember is that your icon should be 108 x 108 pixels. For more information on the design guidelines, you can check out the Adaptive Icons documentation.
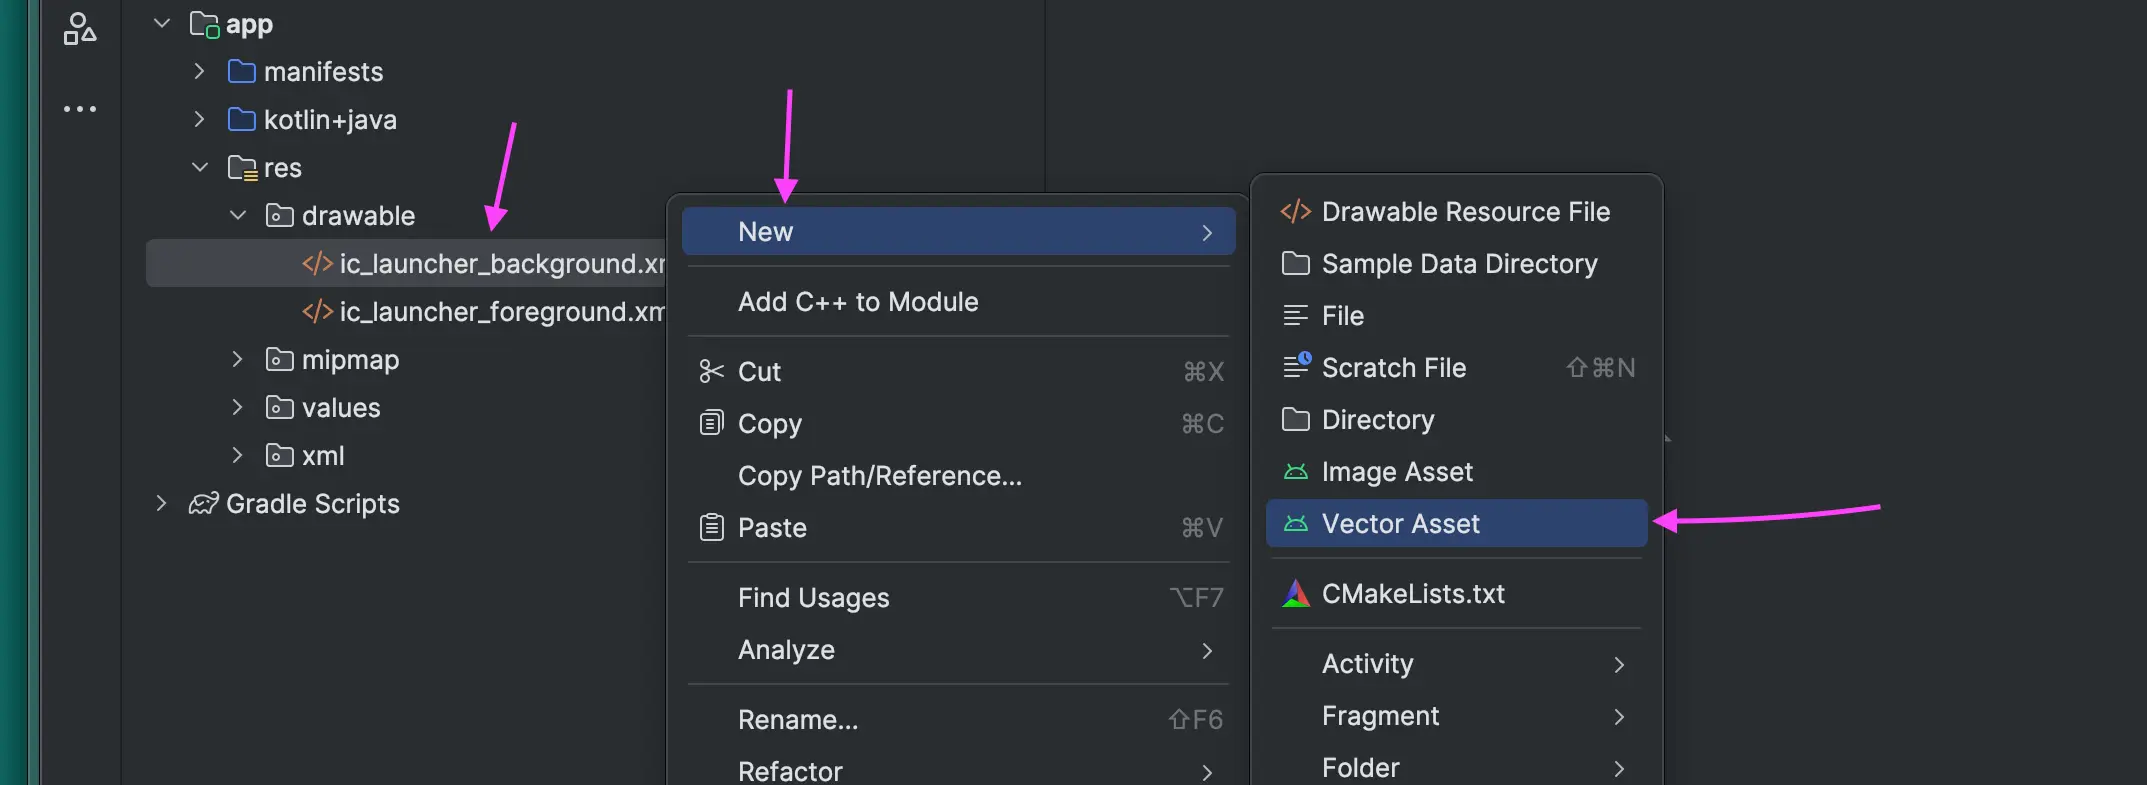
Once your two SVG files are ready, you can convert them into XML. Simply right-click on the XML file you want to start with, then go to New > Vector Asset. The UI is pretty straightforward — just point to your SVG file and hit Finish.
Once you’ve got those two XML files in place, it’s time to bring in Image Asset Studio. Right-click on the res folder, then go to New > Image Asset, and voilà — a new window will appear. The UI is pretty straightforward, so just select your ic_launcher_foreground.xml for the foreground and the other XML file for the background, then hit Finish.
However, in my experience, the “monochrome” line won’t be added automatically. So, head over to res/mipmap/ic_launcher/ic_launcher.xml and manually add the monochrome line pointing to your ic_launcher_foreground.xml file.
That’s it! To test it out, do a fresh install of your Flutter app.
One more thing: Image Asset Studio might generate some redundant files, so it’s a good idea to clean those up — though it’s not absolutely necessary. Now, go ahead and check your Android device settings. If you see the monochrome icon in action, then you’ve nailed it! But if you’re still running into issues, no worries — I’ve recorded myself walking through the process in this YouTube video. Good luck!